The scenario in issue #9 is played across two issues as a
battle report recounting the outcome of the battle as fought by two Games
Workshop employees. To reflect this, I’ll discuss the scenario in two parts.
The first is a recap of the battle wherein my friend and regular opponent,
Dave, played the forces of Good while I commanded Evil. For the issue #10
coverage, I’ll discuss how the game turned out when it was my turn to command
the Good warriors of Middle-earth.
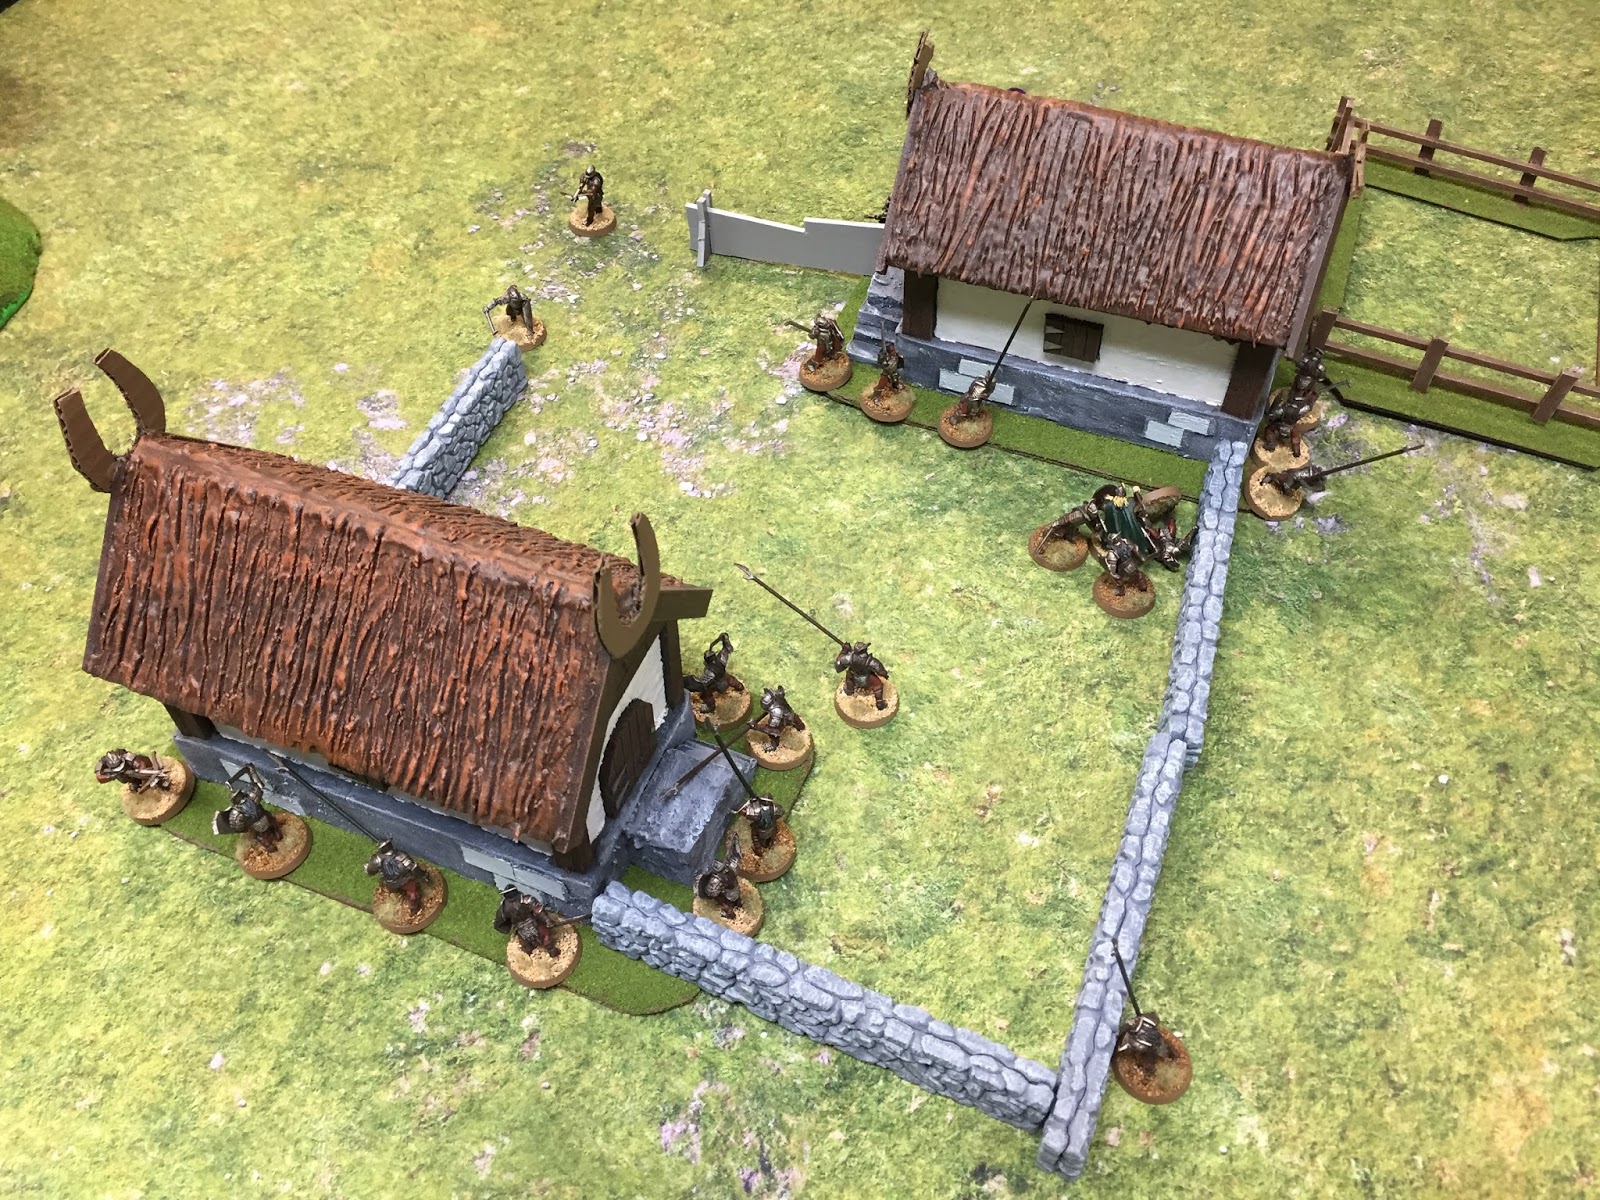
“Burn the Village!” features a small Rohan hamlet facing off
against a horde of Uruk-hai. The Rohirrim are outnumbered and facing
heavily-armored enemies. Their only hope is the timely arrival of the Three
Hunters—Aragon, Legolas, and Gimli—who are passing nearby in pursuit of the
captured hobbits when Rohan is attacked. If the Rohirrim can light a signal
beacon calling for aid, the three heroes rush to lend their assistance—hopefully
before the troops of the White Hand burn down the village’s two buildings!
Mechanically, once Good lights the signal
beacon, the Rohan player rolls 1d6 for each of the three heroes on subsequent
turns. If the roll is 4+, that hero arrives on the table side with the beacon
and can charge immediately into battle.
Likewise, in order for the Uruk-hai to burn down a building,
one or more of their models must be in base contact with the structure and not
be involved in combat. Additionally, no Good model can also be in contact with
the building and not be engaged in battle. If these conditions are met, each
applicable Evil model rolls 1d6 and on a result of “6” the building catches
fire and is destroyed.
In the first game, Dave set most of the Rohan warriors up
behind the village’s walls, giving him the benefit of defending an obstacle in the forthcoming fight ("In the way" rolls, single combats, etc.
as explained in issue #7). I
had only four archers and arrayed them on either side of the path from the
village to the beacon. It was my hope to kill any Rohan troops running to the
beacon before they could light it. Dave countered by sending two troops off towards
the beacon, while I moved the rest of my forces towards the village from three
sides.
The walls worked in the favor of Rohan at the beginning,
stalling my efforts to get inside the village and kill enough of the Rohirrim
so that I could set the buildings alight unimpeded. Eventually, however, one or
two Rohan Warriors were slain despite the walls’ protection and I sent Uruk-hai
leaping inside the perimeter. Once the levy broke, the tide of the White Hand
overwhelmed the Rohan forces inside.
Dave had terrible luck with reinforcements. He managed to
get the signal beacon lit by the end of Turn 3, but failed every reinforcement
roll (three each round!) to get the Good heroes onto the board and help turn
the tide of battle. He might have gotten Gimli onto the board near the end of the game (it's been awhile since we played this battle and my memory is spotty), but
the dwarf’s short legs didn’t get him anywhere near the fight before I
surrounded the Rohan houses with multiple models and burned them to the ground.
Score one victory for Evil!
Next, it would be me turn to command Rohan. Could I do any
better? We’ll find out when coverage of Battle Games in Middle-earth #10 occurs
shortly!
 |
| The forces are arranged for battle |
 |
| The Uruk-hai approach as Dave measures out the movement of the Rohan warrior headed towards the signal beacon. |
 |
| Uruk-hai supported by pikemen approach the village wall while Rohan prepares to receive them. |
 |
| The battle is joined! |
 |
| Uruk-hai have breached the village's defenses! |
 |
| The signal fire is lit! Help must come to Rohan! |
 |
| Rohan falls back to defend the village's building from the flames of Saruman's troops. |
 |
| Surrounded! |
 |
| The forces of Rohan have been slain and the buildings are burned. Victory for Evil! |


No comments:
Post a Comment